
Best DIY Slippers to Make at Home in 2026 in July 2026
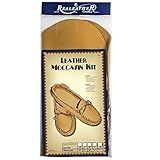
Realeather C4604-03 Adult Moccasin Leathercraft Kit, Size 8-9, Golden Tan, 1-Pair
- COMFORTING DEERTAN LEATHER MOLDS TO YOUR FEET WITH EVERY WEAR.
- EASY-TO-USE KIT: PRE-CUT PARTS AND CLEAR ASSEMBLY INSTRUCTIONS.
- PROUDLY CRAFTED IN THE USA FOR QUALITY YOU CAN TRUST.


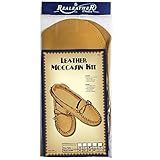
Realeather Crafts C4604-04 Leather Moccasin Kit, Size 10/11, Gold/Tan
- LADIES ORDER YOUR SIZE, MEN ORDER ONE SIZE LARGER!
- DURABLE, COMFORTABLE LEATHER MOCCASINS MADE IN THE USA.
- LIGHTWEIGHT AT JUST 0.66 LB FOR EASY WEAR ALL DAY.

Realeather Crafts C4604-02 Leather Moccasin Kit, Gold
- EASY-TO-USE KIT FOR ALL SKILL LEVELS-CREATE YOUR OWN MOCCASINS!
- MADE IN THE USA WITH HIGH-QUALITY, DURABLE MATERIALS FOR LASTING WEAR.
- PERFECT FOR CRAFTING ENTHUSIASTS-GREAT GIFT IDEA FOR CREATIVES!
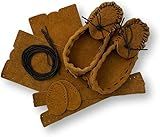
Moccasins Making Kit - Handmade Moccasins Kit - DIY Leather Moccasin Craft Project - Miscellaneous Brown or Tan Colors (Infant S - Suede)
-
PREMIUM COMFORT: CRAFTED FROM NATURAL LEATHER FOR ULTIMATE SOFTNESS.
-
VERSATILE STYLE: WEARABLE FOR ANY OCCASION-SMART CASUAL OR FORMAL!
-
LASTING QUALITY: DURABLE DESIGN ENSURES SHOES WITHSTAND WEAR FOR YEARS.
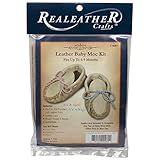
Realeather C4607-00 Baby Moccasin Leathercraft Kit, Size 6-9 Months, Buckskin, 1-Pair
-
CUSTOM FIT: DURABLE DEERTAN LEATHER MOLDS TO YOUR CHILD'S FEET OVER TIME.
-
ALL-IN-ONE KIT: PRE-CUT PARTS AND EASY INSTRUCTIONS MAKE CRAFTING SIMPLE.
-
PROUDLY MADE IN USA: SUPPORT LOCAL CRAFTSMANSHIP WITH EVERY PURCHASE.
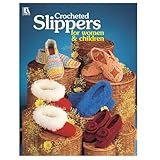
LEISURE ARTS Crochet Slippers for Women and Children: Crochet Book, Pattern Books, Stitch Patterns for Beginners
- CREATE 7 STYLISH SLIPPER DESIGNS FOR COZY COMFORT.
- BEGINNER-FRIENDLY PATTERNS WITH EASY INSTRUCTIONS FOR ALL SKILL LEVELS.
- PERFECT FOR GIFTING, ADDING A PERSONAL TOUCH TO ANY OCCASION.
KIBBEH 2Pcs Wet Felting Tool, Versatile Fulling Block, Great for Working on Seams, Flat Felts, Hat & Slipper Shaping
- SIMPLIFY WET FELTING WITH OUR FAST, HIGH-QUALITY TOOLS!
- VERSATILE FOR HATS, SLIPPERS, AND VARIOUS FIBER ART PROJECTS!
- PERFECT DIY GIFT FOR CRAFT LOVERS-SHARE CREATIVITY WITH OTHERS!

Leinuosen 2pcs Wet Felting Tool Set Include Ball Brause Sprinkler and Wet Felting Tool Great for Working on Seams, Flat Felts, Hat & Slipper Shaping
-
VERSATILE TOOL FOR DIY CRAFTS AND DAILY CLEANING NEEDS.
-
ERGONOMIC DESIGN FOR COMFORT AND ENHANCED FELTING CONTROL.
-
PERFECT GIFT FOR ARTISTS AND GARDENERS, SPARKING CREATIVITY!
In 2025, crafting your own slippers at home has become not only a cost-effective trend but also a rewarding hobby. With a few materials and some creativity, you can create comfortable, custom-made footwear right in your living room. In this guide, we’ll walk you through the step-by-step process of making your own DIY slippers, offering tips and insights to refine your craft.
Materials You’ll Need
Before diving into the slipper-making process, gather the following materials:
- Fabric: Soft materials like fleece, cotton, or even recycled fabrics work well.
- Rubber Soles: You can purchase these from craft stores or use repurposed materials like old yoga mats.
- Felt or Foam Padding: For added comfort.
- Sewing Kit: Needles, thread, scissors, and pins.
- Stencil Paper: To draft your slipper pattern.
Step-by-Step Guide to Craft Your Slippers
Step 1: Design Your Slippers
Start by envisioning your perfect pair of slippers. Consider design elements like color, style, and features. Draft your design on stencil paper to use as a pattern in the next step.
Step 2: Cut the Pattern
Using your stencil, cut out the fabric pieces for your slippers. Typically, you will need a pattern for the top, sole, and heel. Precisely cutting these pieces ensures your slippers will fit well and look professional.
Step 3: Sew the Upper Part
Pin the fabric pieces together and sew the upper portion of the slipper. Use a durable thread and a sturdy stitch for longevity. For beginners, a basic slipper might just require sewing the top to the sole, while advanced designs could involve additional embellishments.
Step 4: Attach the Sole
Lay the fabric sole and rubber sole together and sew them along the edges. Ensure the rubber side faces outward for grip. Adding felt or foam between the layers enhances comfort and insulation.
Step 5: Customize and Decorate
Now that the basic structure is complete, personalize your slippers. Options include adding embroidery, attaching buttons, or sewing on patches. This step turns a simple slipper into a fashionable and personal item.
Step 6: Test and Adjust
Once assembled, try on your slippers to ensure a good fit. Make necessary adjustments, such as tightening or loosening the fit around the ankle or adjusting the sole’s cushioning.
Tips for the Best DIY Slippers
- Choose Quality Fabrics: Opt for durable and soft materials to enhance comfort.
- Measure Accurately: Proper measurements ensure your slippers are a perfect fit.
- Use Strong Stitches: Reinforcing the stitching at stress points will increase the longevity of your slippers.
- Utilize Online Tutorials: Platforms like YouTube have visual guides that can provide additional tips and tricks.
Cost Savings & Benefits
Creating your own slippers at home can significantly reduce expenses compared to purchasing brand-name footwear. Moreover, DIY projects are an eco-friendly alternative due to the use of recycled and natural materials. Plus, the act of crafting itself offers relaxation and a sense of accomplishment.
For those who may prefer purchasing slippers, or wish to explore more deals on ready-made options, consider checking out the discount slippers offers for great savings.
Conclusion
Making your own slippers at home in 2026 combines creativity, practicality, and sustainability. With the right materials and a bit of patience, you can craft personalized slippers that suit your style and comfort needs. Whether it’s a project for yourself or a gift for a loved one, DIY slippers provide a unique and cherished item that ready-to-buy options simply can’t match. So why not take a step forward in the DIY journey? Your cozy and stylish new slippers await!