
Best Freezing Tips for Chicken Drumsticks in July 2026
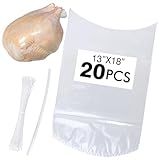
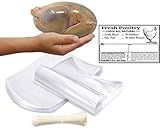
Poultry Shrink Bags, Chicken Bag, 20Pack 13x18 Inches Clear Poultry Heat Shrink Wrap Freezer With 20 Zip Ties, a Silicone Straw for Chickens, Rabbits
-
20PCS CHICKEN BAGS & ZIP TIES: PERFECT FOR ALL YOUR POULTRY NEEDS!
-
EASY-TO-USE: SIMPLY DIP IN HOT WATER FOR A PROFESSIONAL FINISH!
-
PROLONG SHELF LIFE: ENJOY FRESH FLAVOR & NUTRITION WITH EVERY BITE!


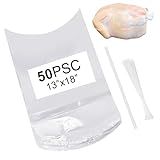
Poultry Shrink Bags, (50Pcs 13x18’’) chicken bags + 50 Heat-Resistant Zip Ties + a Silicone Straw., For Chickens, Rabbits and other meats, lock in freshness, nutrition, and extend storage time.
- GET 50 HIGH-QUALITY SHRINK BAGS PLUS TOOLS FOR HASSLE-FREE SEALING!
- KEEP MEATS FRESH FOR LONGER WITH BAGS THAT EXTEND SHELF LIFE SIGNIFICANTLY!
- EASY-TO-USE DESIGN ENSURES PROFESSIONAL RESULTS EVERY TIME-NO MESS!
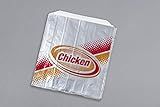
Foil Laminated Chicken Sandwich Bag, Stock Printed Chicken on Silver Foil, 6"x3/4"x6-1/2" Size, 1000 Bags Per Case
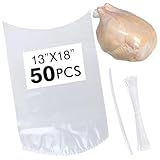
Anmboor 50Pack 13x18 Inches Poultry Shrink Bags, Chicken Bag, Clear Poultry Heat Shrink Wrap Freezer With 50 Zip Ties, a Silicone Straw for Chickens, Rabbits
- 50PCS CHICKEN BAGS + TIES + STRAW ENSURE ALL YOUR NEEDS ARE MET!
- ACHIEVE A PRO LOOK IN MINUTES-JUST DIP IN HOT WATER!
- EXTEND SHELF LIFE & PRESERVE FLAVOR WITH OUR HIGH-QUALITY BAGS!
Poultry Shrink Clear Bags (L)- 10"x 16" Chickens or Rabbits w/zip ties and Freezer Labels included (25)
- TOP-QUALITY USA-MADE BAGS - PREVENTION OF FREEZER BURN!
- THICKEST SHRINK BAGS ON AMAZON - 2.5 MIL FOR MAXIMUM DURABILITY!
- INCLUDES ZIP TIES & LABELS - PROFESSIONAL FINISH FOR POULTRY!
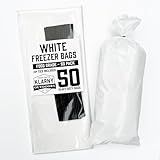
UltraSource Meat Freezer Bags, 1lb. White (Pack of 1000), for Packaging Meat
-
PERFECT FOR MEAT PROCESSORS AND HUNTERS, IDEAL FOR WILD GAME STORAGE.
-
STRONG 2-MIL THICKNESS PREVENTS PUNCTURES AND ENSURES SAFE HANDLING.
-
PERSONALIZE BAGS WITH NOTES OR BRANDING FOR A PROFESSIONAL TOUCH.
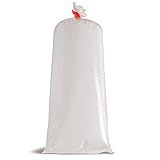
Klarny Outdoors Wild Game Freezer Bags, 1.5 LB Hunting Meat Packaging Storage System with Twist Ties for Preventing Freezer Burn (50 Bags)
- DURABLE DESIGN WITH UNBREAKABLE SEAMS FOR LONG-LASTING USE.
- BLAZE ORANGE COLOR MAKES BAGS EASY TO SPOT IN YOUR FREEZER.
- PERFECT FOR DIY PROCESSORS-SAVE MONEY & PACKAGE YOUR OWN MEAT!
When freezing chicken drumsticks, it is important to ensure that they are properly stored to maintain their quality and taste. The recommended duration for freezing chicken drumsticks ranges from 9 to 12 months. However, it is generally best to consume them within 6 months to ensure optimal flavor.
Freezing chicken drumsticks helps to preserve their freshness by preventing the growth of bacteria. To freeze chicken drumsticks, follow these steps:
- Rinse the drumsticks under cold water and pat them dry with paper towels.
- Place the drumsticks in airtight, freezer-safe bags or containers.
- Squeeze out any excess air, seal the bags tightly, or secure the containers' lids.
- Label the bags or containers with the date to keep track of their freezing time.
- Place the chicken drumsticks in the coldest part of the freezer, such as the back or bottom shelf, to ensure consistent temperature.
When you are ready to use frozen chicken drumsticks, it is recommended to thaw them either in the refrigerator or using the cold water method. Thawing in the refrigerator can take approximately 24 hours, depending on the size and thickness of the drumsticks. Thawing in cold water requires placing the sealed bag or container in a bowl of cold water, changing the water every 30 minutes until the drumsticks are fully thawed, which usually takes around 1-3 hours.
Remember to discard any chicken drumsticks that have been frozen for longer than their recommended shelf life. Additionally, always practice safe food handling and cooking methods to prevent foodborne illnesses.
How to properly store chicken drumsticks in the freezer?
To properly store chicken drumsticks in the freezer, follow these steps:
- Wrap the drumsticks individually: Wrap each drumstick tightly with plastic wrap or aluminum foil. This will protect them from freezer burn and prevent them from sticking together.
- Use freezer bags: Place the wrapped drumsticks in a sturdy freezer bag. Squeeze out as much air as possible before sealing the bag to minimize freezer burn.
- Label and date: Write the current date on the bag, so you can easily keep track of how long the drumsticks have been frozen. Also, label the bag with the contents, so you can quickly identify it later.
- Arrange properly: Lay the wrapped drumsticks flat in a single layer in the freezer. This helps them freeze faster and prevents them from sticking together.
- Preserve freshness: If you have a vacuum sealer, it's highly recommended to use it as it will remove all the air from the packaging, preserving the freshness and quality for a longer period.
- Keep a consistent temperature: Ensure that your freezer maintains a constant temperature of 0°F (-18°C) or below to prevent any bacterial growth or spoilage.
By following these steps, you can store chicken drumsticks in the freezer for up to 9 months. Remember to thaw them properly before cooking by either letting them defrost in the refrigerator overnight or using the defrost function on your microwave.
What is the best way to cook frozen chicken drumsticks?
There are several ways to cook frozen chicken drumsticks, but here are four popular methods:
- Oven Baking: Preheat your oven to 375°F (190°C). Place the frozen chicken drumsticks on a baking sheet. Season them with your desired spices or marinade. Bake for about 45-50 minutes until they reach an internal temperature of 165°F (74°C). For crispy skin, broil the drumsticks for a few minutes at the end.
- Air Frying: Preheat your air fryer to 400°F (200°C). Place the frozen drumsticks in the air fryer basket in a single layer without overcrowding. Coat them with a little oil and seasonings. Cook for approximately 20-25 minutes, flipping halfway through, until they reach an internal temperature of 165°F (74°C). Increase the cook time if needed for larger drumsticks.
- Grilling: Preheat your grill to medium-high heat. Brush the frozen chicken drumsticks with oil and seasonings. Grill the drumsticks for about 20-25 minutes, turning occasionally, until they reach an internal temperature of 165°F (74°C). Use a thermometer to ensure they are cooked through.
- Stovetop Simmering: Fill a large pot with water or chicken broth, enough to cover the drumsticks. Place the frozen drumsticks in the pot and bring it to a boil. Reduce the heat to medium-low and simmer for about 30-35 minutes or until they reach an internal temperature of 165°F (74°C). Remove the drumsticks from the liquid and pat them dry. Optionally, you can sear the cooked drumsticks in a hot skillet to crisp up the skin.
Remember, cooking times may vary depending on the size and thickness of the drumsticks, so it's always best to check the internal temperature with a meat thermometer to ensure they are fully cooked.
What is the ideal thickness for freezing chicken drumsticks?
The ideal thickness for freezing chicken drumsticks is between 1 to 1.5 inches. This ensures that the drumsticks freeze evenly and maintain their quality during storage. Thicker drumsticks may take longer to freeze and could result in uneven freezing or potential freezer burn. It is recommended to package the drumsticks in airtight containers or freezer bags before freezing to maintain their freshness.
What is the optimal freezing container for chicken drumsticks?
The optimal freezing container for chicken drumsticks would be airtight, freezer-safe plastic bags or containers. These containers should be specifically designed for freezing foods to prevent freezer burn and maintain the quality of the chicken drumsticks. Make sure to label the containers with the freezing date for easy tracking.
How to check if frozen chicken drumsticks have gone bad?
To check if frozen chicken drumsticks have gone bad, you can follow these steps:
- Examine the packaging: Look for any signs of damage or tears in the packaging. If there are any, it could have allowed air and bacteria to enter, increasing the chances of spoilage.
- Check for ice crystals: Frozen chicken should have a solid layer of ice crystals on its surface. If you see large ice crystals or a lot of frost, it may indicate that it has been thawed and refrozen, which can impact its quality.
- Observe the color: Properly frozen chicken drumsticks should have a pinkish color. If they appear gray or have any discoloration, it may indicate spoilage.
- Check for odors: Give the chicken drumsticks a sniff. If they have a strong, unpleasant, or sour smell, it is likely that they have gone bad and should be discarded.
- Feel the texture: The chicken should feel firm and have a solid texture. If it feels slimy, sticky, or excessively soft, it is a potential sign of spoilage.
- Thaw and cook properly: If you are still unsure about the quality of the frozen chicken drumsticks, it is recommended to thaw and cook them thoroughly. Cooking the chicken to an internal temperature of 165°F (74°C) will destroy any harmful bacteria or pathogens that might be present.
Remember, it is always better to be safe than sorry. If you have any doubts about the quality or safety of frozen chicken drumsticks, it is best to err on the side of caution and dispose of them.
How to properly thaw frozen chicken drumsticks?
To properly thaw frozen chicken drumsticks, you can follow these steps:
- Choose the proper thawing method: There are three safe methods to thaw frozen chicken drumsticks: in the refrigerator, in cold water, or in the microwave. The refrigerator method is highly recommended as it maintains a safe temperature throughout the thawing process.
- Thaw in the refrigerator: Place the frozen drumsticks in a leak-proof plastic bag or airtight container to prevent any potential cross-contamination. Put them in the refrigerator on a plate or in a shallow dish to catch any potential drips. Allow 24 hours for every 2-3 pounds of chicken. For instance, if you have 1 pound of drumsticks, it will take around 8-12 hours to thaw.
- Thaw in cold water: If you need to thaw the drumsticks quickly, you can submerge them in cold water. Ensure the drumsticks are sealed in a leak-proof plastic bag, then place them in a larger container filled with cold water. Change the water every 30 minutes to maintain a safe temperature. It takes approximately 1 hour to thaw 1 pound of chicken drumsticks using this method.
- Thaw in the microwave: If you're in a hurry, you can also use the microwave to thaw the drumsticks. First, make sure the chicken is in a microwave-safe container or package, and use the defrost setting or low power setting to avoid starting the cooking process. Be sure to cook the drumsticks immediately after thawing using this method to prevent any bacterial growth.
- Check for doneness: Once the drumsticks are fully thawed, check they no longer have any ice crystals and are fully flexible. The internal temperature of the chicken should be at least 165°F (74°C) when cooked to ensure it is safe to eat.
Remember, it's crucial to never thaw chicken drumsticks on the countertop at room temperature, as this can allow harmful bacteria to multiply rapidly.