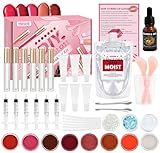
Best Lip Balm Kits with Real Fruit in July 2026
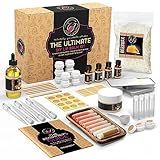
CraftZee Organic Lip Balm Making Kit. DIY Lip Gloss Pack, Natural Beeswax, Shea Butter, Sweet Almond Oil, Essential Oils, Tools, Instruction Manual. Sleepover Party Supplies for Girls, Adult Craft Kit
- CREATE PERSONALIZED LIP BALMS WITH NATURAL, SKIN-LOVING INGREDIENTS!
- IDEAL DIY KIT FOR ALL AGES: FUN SPA DAYS OR MEMORABLE GIFTS!
- EVERYTHING YOU NEED INCLUDED FOR A QUALITY LIP GLOSS MAKING EXPERIENCE!


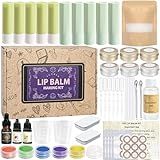
JUYRLE Lip Balm Making Kit- Coconut Lip Gloss Kit with Beeswax, Jojoba Oil, and Coconut Oil for Adults & Girls, Make Your Own Lip Balm– DIY Moisturizing Lip Care
- ALL-IN-ONE KIT: CREATE 10 LIP BALMS WITH INCLUDED INGREDIENTS AND TOOLS!
- NOURISHING FORMULA: ENJOY SOFT, MOISTURIZED LIPS WITH NATURAL INGREDIENTS.
- PERFECT GIFT IDEA: DELIGHT GIRLS AGE 5-14 WITH A FUN DIY LIP BALM EXPERIENCE!
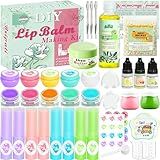
BRIPATI Lip Balm DIY Making Kit - Lip Gloss Set to Make Your Own Lipsticks with Natural Beeswax, Sweet Almond Oil, Shea Butter, Tubes, Jars - Adults Girls Women Moisturizing Lip Care Kit
- ALL-IN-ONE KIT: COMPLETE DIY KIT FOR CRAFTING UNIQUE LIP BALMS EASILY!
- CREATIVE FUN: MIX COLORS AND SCENTS FOR ENDLESS LIP BALM CREATIONS!
- NATURAL CARE: NOURISHING INGREDIENTS FOR SILKY, HYDRATED LIPS!
BRIPATI DIY Lip Balm Making Kit for Adults to Make Your Own Moisturizing Lip Balms with Natural Beeswax, Lip Base Oil, Essential Oil, Empty Lip Balm Tubes Jars, Birthday Christmas Mother’s Day Gift
- CREATE CUSTOM, COLORFUL LIP BALMS WITH OUR EASY DIY KIT!
- NOURISH AND HYDRATE LIPS WITH NATURAL, HIGH-QUALITY INGREDIENTS.
- PERFECT GIFT FOR ALL AGES-FUN, CREATIVE BONDING EXPERIENCE!
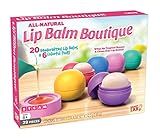
SmartLab Toys All-Natural Lip Balm Boutique Multicolor, 11" H x 8 1/2" W x 2" D
- CUSTOMIZABLE LIP BALMS: UNLEASH CREATIVITY IN EVERY BATCH!
- FUN FOR ALL AGES: PERFECT FOR AGES 8 AND UP!
- COMPLETE KIT: INCLUDES EVERYTHING YOU NEED TO GET STARTED!
PURPLE LADYBUG DIY Lip Balm Making Kit - Natural Lip Care Craft - Make Your Own Lip Balm with 3 Flavors, STEM Science for Kids, Birthday Gifts, Girls Christmas Gift Idea for 8-12 Tweens & Teens
- CREATE 10 CUSTOM LIP BALMS WITH FUN FLAVORS AND COLORFUL LABELS!
- SAFE, NATURAL INGREDIENTS ENSURE GENTLE CARE FOR YOUNG SKIN.
- ENGAGE CREATIVITY AND LEARNING WITH FUN, HANDS-ON STEM CRAFTING!
JUYRLE DIY Lip Balm Kit - Make Your Own Natural Beeswax Lip Balm with Containers, Moisturizing Base, Perfect for Kids and Adults
-
ALL-IN-ONE KIT: EVERYTHING NEEDED TO CREATE LIP BALM IS INCLUDED!
-
NATURAL INGREDIENTS: MADE WITH PREMIUM BEESWAX, SHEA BUTTER & ALMOND OIL.
-
CREATIVE FUN: KIDS CAN CUSTOMIZE FLAVORS AND COLORS FOR UNIQUE BALMS!
TSVATE Lip Gloss Making Kit, Lip Gloss Kit, Diy Lipgloss Set, Fun Make Your Own Lipgloss Kids Lip Gloss for Girls, Women, Moisturizing Lip Gloss Base, Jojoba Oil, Tubes, Gift for Her
- ENDLESS CUSTOMIZATION: CREATE UNIQUE LIP GLOSS COLORS WITH 8 PIGMENTS!
- MOISTURIZING FORMULA: JOJOBA OIL ENSURES HYDRATING, GLOSSY LIPS.
- PERFECT GIFT IDEA: BEAUTIFULLY PACKAGED FOR BIRTHDAYS AND SPECIAL OCCASIONS!
Making lip balm with real fruit is a fun and natural way to create a moisturizing product for your lips. By using actual fruit, you can infuse your lip balm with natural oils and vitamins. Here are the steps to make lip balm with real fruit:
- Choose your fruit: Select a fruit that is known for its moisturizing properties, such as strawberries, raspberries, or coconut.
- Prepare the fruit: Wash and pat dry the fruit of your choice. Remove any stems, seeds, or pits.
- Extract the juice: You can extract juice from the fruit in different ways depending on the fruit you use. For berries, you can crush them with a fork and strain the juice through a mesh strainer. If you're using coconut, you can grate it and then squeeze out the juice.
- Melt the base: In a double boiler or microwave, melt a combination of beeswax, shea butter, and coconut oil. The ratio can vary, but a common mixture is 1 part beeswax, 1 part shea butter, and 2 parts coconut oil.
- Add the fruit juice: Once the base ingredients are melted and combined, remove from heat and add the fruit juice. Stir well to ensure it is evenly distributed.
- Optional: If you want to add a hint of color to your lip balm, you can mix in a small amount of natural food coloring at this point.
- Pour into containers: Carefully pour the mixture into lip balm containers or small jars. Leave some room at the top for it to solidify.
- Let it cool and solidify: Allow the lip balm to cool and solidify completely. This may take a couple of hours.
- Label and store: Once the lip balm has cooled and solidified, you can label each container with the flavor and date. Store the lip balm in a cool, dry place.
Enjoy your homemade lip balm with real fruit! Remember to replace it every few months to maintain its freshness and effectiveness.
How do I melt the ingredients for lip balm?
To melt the ingredients for lip balm, you can follow these steps:
- Gather your ingredients: Beeswax, carrier oil (such as coconut oil or sweet almond oil), and any optional ingredients like essential oils or vitamin E oil.
- Use a double boiler: Fill a larger pot with water and place it on the stove. Place a smaller heat-safe glass or metal bowl on top of the pot. Ensure the bottom of the bowl does not touch the water.
- Measure the ingredients: Take the desired amount of beeswax and carrier oil as per your recipe. A common ratio is 1 part beeswax to 3 parts carrier oil, but you can adjust according to your preference.
- Add the beeswax to the bowl: Place the measured beeswax into the smaller bowl.
- Melt the beeswax: Turn the stove on low heat and allow the wax to gradually melt. Stir occasionally to help it melt evenly.
- Add carrier oil: Once the beeswax has melted completely, add the carrier oil to the bowl. Stir well to combine the ingredients.
- Optional: If you are adding any essential oils or vitamin E oil, this is the time to include them. Add a few drops and stir thoroughly.
- Remove from heat: Turn off the stove and carefully remove the bowl from the double boiler. Be cautious as the bowl may be hot, so use oven mitts or a towel.
- Pour into containers: While the mixture is still in its liquid form, pour it into your chosen lip balm containers, such as small tins or tubes.
- Let it cool and solidify: Allow the lip balm mixture to cool and solidify completely before using or moving the containers.
Remember to clean your utensils and the double boiler promptly, as beeswax can be difficult to remove once solidified. Enjoy your homemade lip balm!
Can I use frozen fruit to make lip balm?
No, you cannot use frozen fruit to make lip balm. Lip balm is typically made using oils, waxes, and sometimes butter, which need to be melted and mixed together to create a smooth and consistent product. Frozen fruit contains water, which can introduce moisture into the lip balm and make it spoil quickly. Additionally, the freeze-thaw process can disrupt the texture and consistency of the lip balm. It is best to use fruit extracts or essential oils specifically made for lip balm recipes to achieve the desired results.
How do I store the lip balm properly?
To store lip balm properly, follow these guidelines:
- Keep it at room temperature: Lip balm should be stored in a cool, dry place at room temperature. Avoid exposing it to extreme heat or cold as it can affect the texture and quality of the product.
- Keep it away from direct sunlight: Prolonged exposure to sunlight can cause the ingredients in lip balm to break down or melt. Store it in a shaded area or in a drawer where it won't be exposed to direct sunlight.
- Ensure proper sealing: Make sure the lip balm is tightly sealed after each use. This prevents air and moisture from entering the container, which can lead to the product drying out or becoming less effective.
- Avoid moisture: Keep lip balm away from any moisture or water sources, as it can cause the product to soften or spoil. Additionally, avoid storing lip balm in areas prone to high humidity, such as a bathroom or near a sink.
- Use hygienic application: When using the lip balm, ensure your hands are clean and dry to avoid introducing any contaminants into the product.
By following these storage tips, you can extend the shelf life and maintain the effectiveness of your lip balm.
Does homemade lip balm with real fruit have any drawbacks?
While homemade lip balm with real fruit may have some benefits like natural fragrance and potential moisturizing properties, it also has certain drawbacks to consider:
- Short shelf life: Real fruit contains water and can easily spoil, decreasing the shelf life of the lip balm. The homemade product may need to be refrigerated or used within a short period.
- Mold and bacterial growth: Due to the presence of natural fruit juices, the lip balm can become a breeding ground for mold and bacteria. Proper hygiene and preservation techniques need to be followed to prevent contamination.
- Texture and consistency: Adding real fruit may alter the texture of the lip balm, making it more grainy or chunky. This could affect the application and overall experience of using the product.
- Allergies and sensitivities: Real fruit may contain allergens or irritants that could cause adverse reactions in some individuals. People with allergies should exercise caution when using lip balm made with real fruit.
- Staining or discoloration: Certain fruits, such as berries, can stain the lips or leave a noticeable tint on the skin. This may not be desirable for those seeking a clear or natural lip balm.
It is important to assess the potential drawbacks and risks associated with homemade lip balm before use. If any negative reactions occur, discontinuing the product is recommended, and consulting a healthcare professional may be necessary.
Can I use a microwave to melt the ingredients?
Yes, you can use a microwave to melt certain ingredients. Microwaves are commonly used to melt butter, chocolate, and cheese, among other things. However, it's important to note that not all ingredients can be safely melted in a microwave. Care should be taken to avoid overheating or burning certain ingredients, such as oils or certain types of plastic. Additionally, it's important to use microwave-safe containers and to follow the appropriate instructions and cooking times.
How do I achieve a smooth texture in the lip balm?
To achieve a smooth texture in lip balm, here are a few steps you can follow:
- Prepare your ingredients: Gather all the necessary ingredients for your lip balm, such as beeswax, carrier oil (like coconut oil or sweet almond oil), and any additional desired ingredients like essential oils or shea butter.
- Melt the beeswax: Place the desired amount of beeswax in a double boiler or a heat-safe container placed in a pot of simmering water. Melt the beeswax slowly over low heat, stirring occasionally until it becomes completely liquid.
- Add carrier oil: Once the beeswax has melted, add the desired amount of carrier oil to the mixture. The ratio of beeswax to carrier oil depends on the desired consistency, but a common ratio is roughly 1 part beeswax to 3 parts carrier oil. Stir well to combine.
- Optional: Add additional ingredients: If you want to incorporate any additional ingredients like shea butter or essential oils, now is the time to add them. Stir the mixture until all the ingredients are well combined.
- Pour into containers: Carefully pour the melted lip balm mixture into lip balm containers or tubes. Be sure to do this while the mixture is still warm and liquid.
- Allow it to cool and solidify: Let the lip balm cool completely in the containers. Avoid moving or disturbing the containers during this process to prevent any air bubbles from forming.
By following these steps and ensuring your lip balm mixture is properly combined and poured, you should achieve a smooth texture in your lip balm.